This is the first dollhouse I have ever had any involvement with, although when I was a little girl, I remember daydreaming about having or making a dollhouse.
My mother-in-law, Diana (Faith's great-nan) was offered this little house for a fiver. She thought it would be nice to fix up the house to give to Faith when she is a bit older (and more importantly, when her little brother, Luke is a bit older). She brought it to my house, knowing I'd be a sucker for a project like this... and I was. I'm a hobbyist, artist and seamstress, so I have lots of stuff I've saved through the years, because I've always had making a dollhouse in the back of my mind. Now it's in the front of my mind, and with a little 'FAITH', I'm going to see this project through.
I searched the Internet for furniture, and soon realised that to furnish this £5 dollhouse, it might take a lot of money. I stumbled upon a site selling punch-out furniture for under a tenner, including postage, so I ordered that since putting together all those pieces seemed a fun challenge. So far less than £15 invested. Sweet!
I thought I'd start this blog and publish it because I read so many other people's blogs and web sites to try to learn more about working with dollhouses. I thought maybe I could give back a little bit, especially since I'm trying to keep the price down, which would probably appeal to most first-time dollhouse owners.
I didn't even know what scale house I had. It turns out the house is a small 1/24 house (20"h x 15"w x 7"d) The furniture kit I ordered is slightly bigger than 1/24 scale, but I discovered it was OK to use in the house as long as I pretty much stuck to the furniture in the kit. It has everything except a refrigerator, washer and dryer, so I'm going to have to think those through a bit. The house was pre-painted on the outside (although a bit scuffed in a few places). I still need to glue the windows to the structure, but it was nice to have the actual house already built.
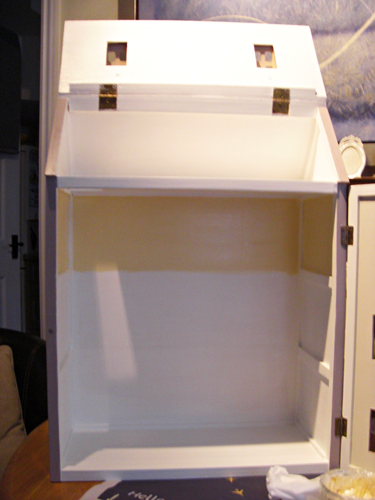
Here I have painted the interior. I planned to paper the bottom two stories. I wanted the master bedroom to be a yellow-golden colour.
The furniture came in four sheets. Here is one after I've punched everything out. I put my phone in the picture so you can see the scale. The large L-shaped piece is the back of the kitchen unit. It was the largest piece in the kit.
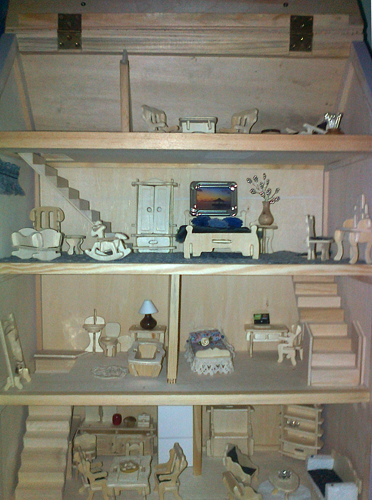
Here is what all the furniture looked like after I put it together. It needed considerable sanding and had to be glued. I was thinking of a re-design on the sofa, but decided to stay with the sofa that came with the kit. The fridge is a box covered with white paper at this point. It's still a bit large for the scale.
I used remnants of material I had used to make decorative pillow covers in my real home to make the blue and the green carpets for the dollhouse. The living room carpet is a little piece of upholstery material I bought for a whopping 15p at a local fabric store.
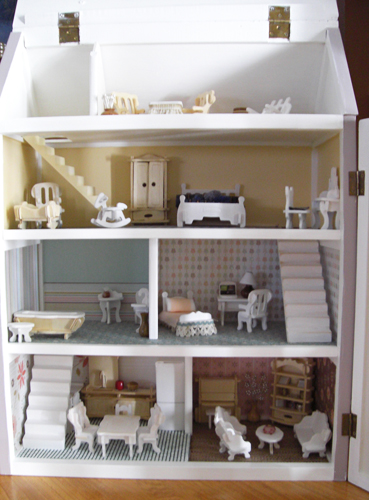
This is what the house looked like after I primed most of the furniture and put in the wallpaper. Most of the paper came from card making supplies. You can see the first stages of the kitchen floor tiles. Please click the DIY (do-it-yourself) link at the top of this page to see how I made the floor from a rubber yoga mat. I'm not sure how I'm going to make the stair rails.
I may use coffee stirrers or buy a few components. We'll see.
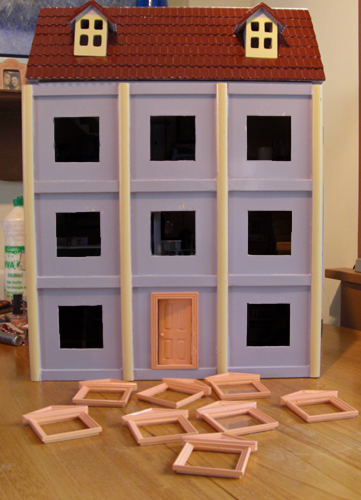
Here is a picture of the outside of the house as it came to me. I had to take the front of the house off so I could sand the front door. It wouldn't shut and it had some very rough areas. I think I'm going to paint the door white, but leave everything else in the original colours. It was easier to paint the inside of the front of the house with it off the hinge. It'll take a bit of work to do all the windows, especially the insides. They are not cut very straight, so they'll need to have frames around the insides. I also have some good ideas about how to do the curtains, which I think will be simple lace valances.
Below are some pictures of the interior. Sorry about the way that most of the pictures here bow out and make the straight lines distort. It's just the way my el-cheapo point-and-shoot camera distorts things.
This page was last updated: February 6, 2013
I'll upload more pictures and further tutorials soon!
Adventures in working with my very first dollhouse (1/24 scale)
My Dollhouse Blog
Faith's Dollhouse
My first dollhouse - built for my granddaughter, Faith
I have a new camera and want to take some pictures of the finished rooms once the days brighten up and get a bit longer so I can take some good natural light shots.