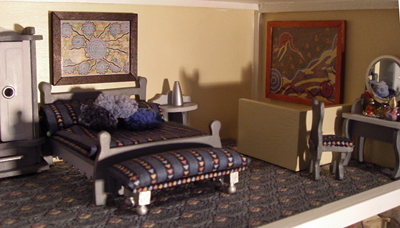
The problem with the foot board (to the big bed that came with the DIY furniture set I bought) was that it looked boring.
I thought I'd give the room a more designer look by adding a matching padded bench at the end of the bed.
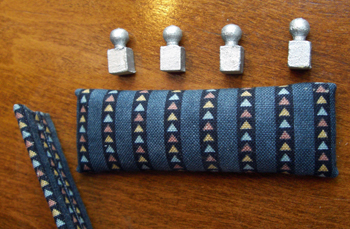
First I painted newel posts that I purchased online through Blackwells.
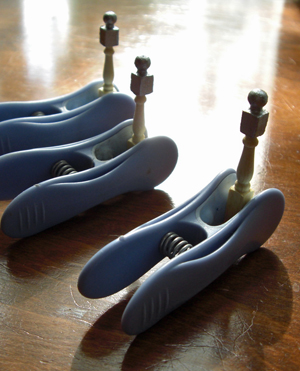
I clamped each piece using a clothes peg, then painted just the part I was going to use. The peg also holds the piece up while it dries.
Once my posts were dry, I cut them with wire cutters and set aside the left-over bit to use for a future project since they are the perfect scale to use for legs on an occasional table, etc.
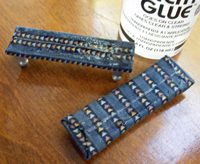
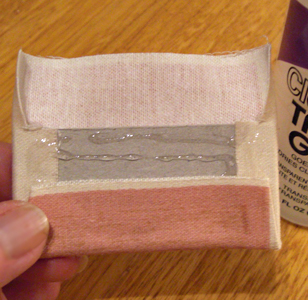
After I made a rigid base and a padded base the sizes I wanted, I glued the legs onto the bottom of the rigid base. Glue them to the nice side. The sides with the raw edges will be glued together and won't show.
The last step is to glue and clamp the pads together.
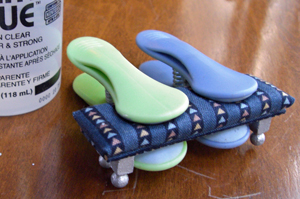
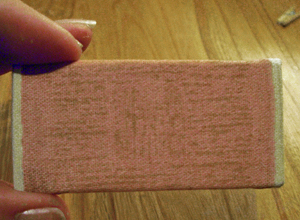
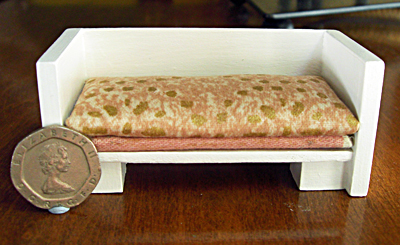
This is how the finished bench looks at the foot of the bed. I made sure to use the pattern in the cloth to my advantage.
I was so encouraged with the padded bench, that I decided to tackle making a day bed for the child's room.
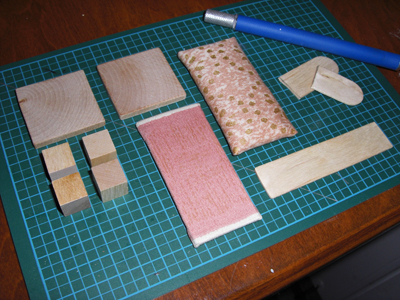
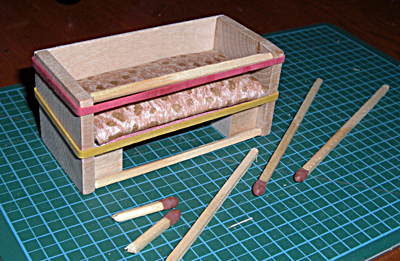
This is a project where I sort of had to learn as I went. These are the pieces I originally thought I would need, but I ended up cutting another slat for the back of the bed plus three long matchsticks to slot in for extra strength, and to just make the piece look functional.
I bought lots of different wooden pieces from craftshapes.co.uk and these tiles and small cubes worked out perfect for this project.
Once again, I made a rigid base and a padded base. The back of the day bed was made from craft sticks purchased from The Works. You could probably use tongue depressors or fat popsicle sticks. I was lucky because two stacked together were the exact height of the 1-1/2" wooden tiles.
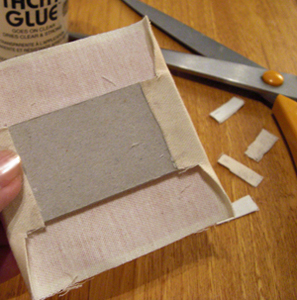
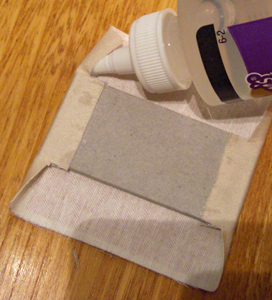
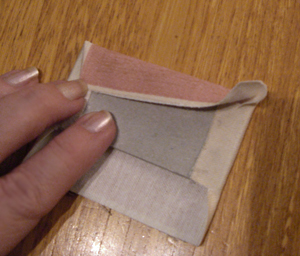
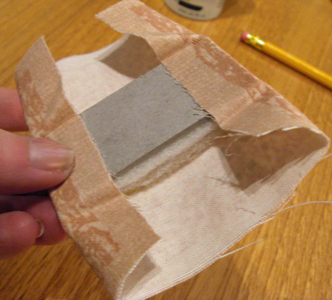
Use a thick piece of cardboard. (mine was sourced from one of my old sketch pads) Cut your cloth, then glue the sides down. Clip away the excess material so when you turn it under again, there isn't so much thickness from the excess cloth. Repeat this process with the other base, but stack four layers of quilt batting before wrapping the cloth around the piece.
I glued two cubes (the feet) to each square tile (the sides) and let them dry. Here is where I discovered I needed the extra piece for the back and some way to add more support as the glue dried. I always keep long matches in my kitchen drawer and found them to be perfect for finishing off the day bed. I cut them easily with my wire cutters (like I did with the newel posts for the padded bench legs).
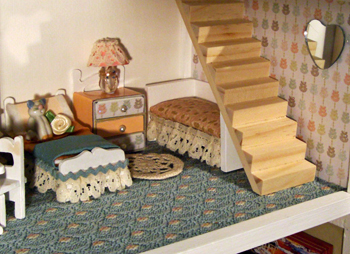
Here is the unit in the bedroom setting. You could decorate the sides with stickers or some fancy brush-work. I decided to keep it plain since the stairs would cover any embellishment.
I still need to finish the wardrobe and staircase.
I added a ruffle and later went back and added a thin satin ribbon over the top part of the ruffle to make it look more finished. I also made a bolster for the back. It all looks cute alongside the matchbook chest of drawers.
The finished piece is very sturdy with match sticks glued in-between and beside the small cube feet. The unit is now ready to decorate to your heart's content. The rigid base and padded piece were glued, raw sides of the material together, and held together with clips until they were almost dry. I then set a heavy paint can on top for several hours to make sure they dried together completely flat.