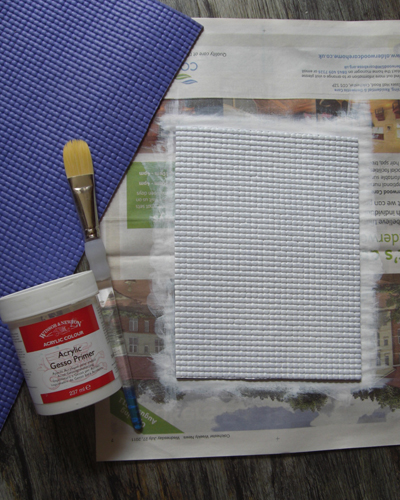
I cut a few inches off the end of my yoga mat which is very blue.
I then cut the piece to the same size as my kitchen floor.
Then I painted on two coats of Acrylic Gesso Primer. You can try experimenting with other base coats, but I'd stay away from anything oil-based because the mat is made from a rubber substance.
I'd recommend not peeling the mat away from your newspaper until all steps are complete - that way it won't slide around on you.
I'm an artist, so I do have a lot of paints and paint supplies on hand. You can pick up cheap acrylic paints at The Works or The Range. A basic colour kit with tubes would be fine. You just have to mix them with a tiny bit of water to make them easier to work with. You can mix a million different colours with a small box set of primary colours (red, yellow and blue) plus a tube each of brown, black and white. Gesso makes an excellent and very fast drying base coat for most any application.
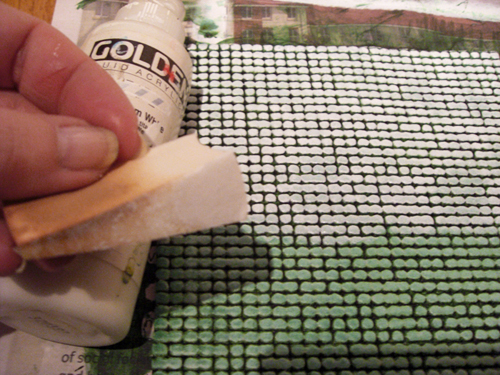
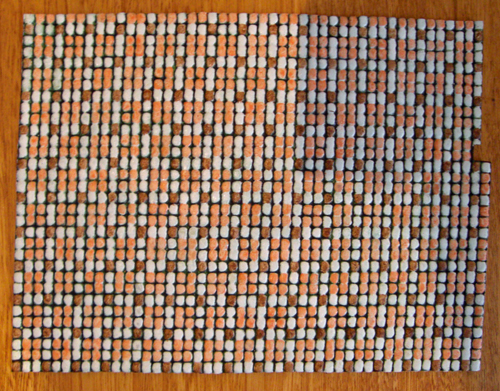
After I let the gesso completely dry, I used Hooker Green acrylic paint and completely covered the white. I then immediately wiped most of the paint off the surface of the tiles, leaving the full-strength colour in the grooves.
You can leave it that colour, but I decided to go back to white. I took a used makeup sponge (excellent fine sponge) and put a very tiny amount of white acrylic paint onto it and dabbed the surface of the 'tiles' white. Don't load too much paint on the sponge or it might squish down into the 'grout'. If you do, you can always touch it up.
This part didn't take very long to do at all. I didn't feel bad about discarding the sponge since it had a useful life :)
I then positioned the floor into the kitchen area and made my final adjustment cut to fit around the little half wall.
Your mat might be a bit wonky (mine was), but I was able to stretch it to a squarer shape.
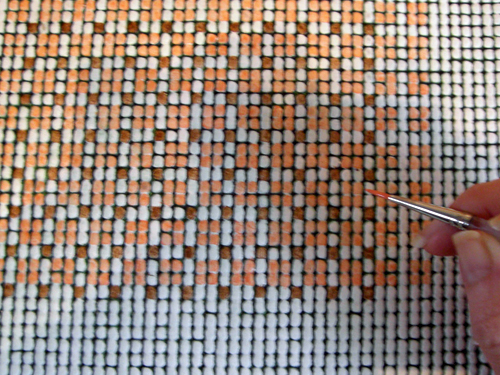
At this point I could have left it as it is. The 'tiles' aren't perfect, but I liked that bit of character, so I painted on further to pick out some of the colours in the wallpaper.
I used acrylic paint to paint the patterned blocks. I found that if I dabbed my finger over the freshly painted block(s), they would appear more aged and natural.
The final step after the entire floor is dry is to peel it off the newspaper, then to touch up any bits on the sides.
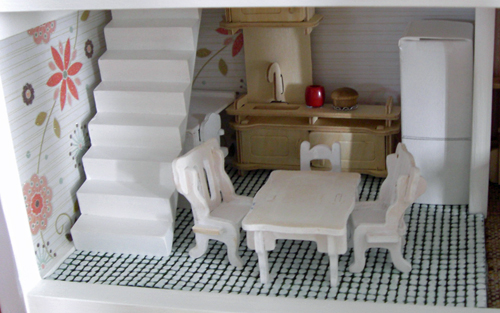
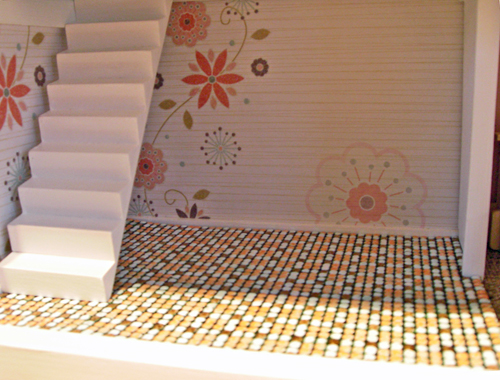
This is the finished floor. It was a bit time-consuming, but I think the scale and effect are well worth the effort.
Since you are painting acrylic paint over a rubber mat, it will be tacky for a while. Be sure not to put any freshly painted furniture on it until it is completely cured or they will bond to each other. I found this floor stays a bit tacky even after curing, but it's nice because the furniture doesn't get knocked around accidentally when I have my big, clumsy hand inside.
I think this method would work in a 1/24 or 1/12 scale house. I think there would be endless possibilities for the grout colours and painting various tile patterns.
I chose a large pattern for the kitchen wallpaper and carefully placed where I wanted the large flowers positioned in relationship to the stairs and the kitchen unit. I will probably put a tiny strip of something between the tile floor and the living room carpet so there is no chance of either floors lifting up.
Everyone comments on how cute the floor is and can't believe it when I show them it was made from a bright blue yoga mat.
I'm now ready to finish the staircase and paint the kitchen units and furniture.